Using Blender
3D models can be used to change the appearance of players, nodes, mobs and other entities.
If you need to create models for your mod, it is recommended that you use Blender.
Engine considerations
Before you begin making artwork for use with Luanti, there are a few things you should know.
Coordinate spaces
Luanti uses a Lefthanded Y-up coordinate space. In a space like this:
- Z axis points "forward"
- Y axis points "up"
- X axis points "right"
Blender uses a Righthanded Z-up coordinate space, where forward is instead the positive Y axis. Make sure that your models are facing that direction. When in doubt, hit G, Y, 1 - if the model has moved forward, that means it's facing the right axis. Otherwise you'll have to rotate it.
Be sure to select Lefthanded Y-up in the exporter if it supports that, to avoid surprises.
Coordinate scale
Luanti currently requires a 10x scale applied to entity models. If you prefer making your models in a metric scale, you will have to set visual_size of entities to 10x. (Nodes do not require this.) Otherwise, model your entities in a scale where 10 units equals one node.
Vertex format
Luanti currently uses the following vertex attributes:
- Vertex position
- Vertex normals
- One texture coordinate channel
File format support
Luanti currently supports the following formats for models:
Animated, skinned models:
- B3D files (
.b3d) - Microsoft DirectX (
.x) (binary & text, compression is not supported)
Static meshes:
- OBJ (
.obj)- The sometimes accompanying
.mtlfiles are not supported and can safely be deleted.
- The sometimes accompanying
Do not use .b3d and .x files for static meshes at the moment, Luanti currently spawns animated mesh scene nodes for these, which may result in reduced performance.
Textures:
.png.jpg.bmp.tga
Any formats not mentioned above but known to work in the past were removed in 5.5.0 and aren't supported anymore.
Picking a skinned mesh format
You have two skinned mesh formats to choose from, and both have their advantages and disadvantages.
- B3D
- [+] Binary format means a small size
- [-] Difficult to postprocess after exporting
- [-] Difficult to debug problems
- X (text version)
- [+] Can be parsed easily with lua scripts
- [+] Can be easily generated by scripts
- [+] Easy to debug issues (you can just read it)
- [+] Can be optimized by quantizing some data
- [-] Blender exporter is kinda buggy and inefficient
- [-] Probably still bigger than an equivalent .b3d
Avoid using the binary X format! It's actually just a tokenized version of the ASCII representation, and may actually be less efficient than a sufficiently optimized text .x file!
Animation support
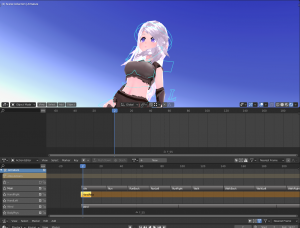
Animation is currently only supported in the form of playing ranges on a single timeline. Do not attempt to export separate actions, instead use the Nonlinear Animation (NLA) editor to arrange your actions into a single strip for export.
Keyframes are always interpolated linearly in the game.
Materials and textures
Multiple materials are allowed on all mesh formats that we support. You can assign different textures to each material slot in the lua API, both on nodes and on entities.
Use only one UV coordinate set for your models.
Optimizing your model for network transfer
Text formats like .obj and the text variant of .x may be optimized by removing unnecessary characters and truncating decimal digits. This will make your mod download much faster when hosted on a server or downloaded from the ContentDB.
Working with Blender
Best practices
- Keep your scene free from unnecessary clutter.
- Always give your objects, armature bones and other assets meaningful names.
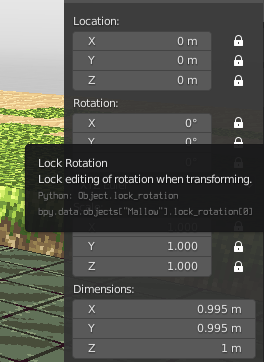
- Lock the transformations of objects and bones that should not be moving, rotating or scaling.
- Apply all object transforms before exporting. Your armature and meshes should probably all have an identity transform, that is, zero position and rotation and 1.0 scale.
- Use only armature bones to animate the model.
- Keep your animations in Actions and use the NLA editor to arrange them in a strip for exporting.
- Keep your .blend files somewhere close to or inside the mod, but not in the ./models/ folder itself.
- Try to set up your materials and the viewport to resemble how things would look like in the game.
- Reference textures from the mod's ./textures/ folder directly instead of packing them or using different files. This will make it easier to keep your assets synced.
Setting up a reference scene
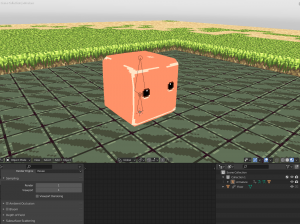
It's a good idea to set up your scene background to resemble a portion of the game world. You can make yourself a reference scene like this and re-use it.
- Open a new .blend file for this purpose.
- Arrange some boxes to act as nodes, and map them with the textures of said nodes.
- Make sure that you have a floor where the floor should be to place the mob or character on.
- Join meshes together to reduce clutter.
- Mark all the objects as unselectable and lock their transforms.
- Save this .blend somewhere.
- Whenever you make a new model, use the File -> Link feature to import this environment.
- The linked objects are still unselectable, so they should not interfere with your work.
Blender 2.80 and later
Setting up the 3D view to look correctly
- Use exactly 1 viewport sample in the render properties to make the viewport look more or less how it would look in the game.
- Disable all postprocessing effects.
- In Color Management, use the Standard transform with 1.0 gamma, or a Raw view transform with 2.2 gamma. Do not use curves.
- Use an Emission shader node in the shader editor for unshaded preview.
Create a basic mob for testing
To create a basic mob, copy an animal from animals_modpack-2.3.6. Then in the init.lua you only have to do a search and replace of the name of the animal, and delete any irrelevant code. You can edit speed, acceleration, etc as you wish.
Making a mesh
- In the 3D View, use the object mode (dropdown in 3D viewport)
- Add objects (eg 3D Menu → Add → Mesh → Cube)
- Move around by right-clicking to select and dragging arrows.
B box/border select. G grab to move.
Resize or rotate using the properties viewport (has a row of camera, cube, spanner, etc at top) - Select the cube
- Use rotation and scale to transform objects
[See the hundreds of Blender tutorials for more advanced editing techniques.] - Create and transform cubes until you have the shape that you want
- Select all the cubes and Join them into one object
- Apply the resulting object's transform and lock it. Your model is now ready.
Saving your work
- Save as a Blender file (Ctrl-S or File → Save)
- Save with the name: yourname.blend (or similar)
Texturing
When the basic model is completed, you'll need to create a texture.
- Switch to Edit Mode
- Mesh/UV Unwrap/Smart UV Project [see one of the many UV Mapping tutorials if you want seams to match, etc]
[optional] Set island margin to 0.004 (this leaves a gap between faces, so there will be less risk of bleeding of colour across sharp edges. 0.002 is approx 1 pixel for a 512 pixel image)
- Mesh/UV Unwrap/Smart UV Project [see one of the many UV Mapping tutorials if you want seams to match, etc]
- Move mouse to the top of the 3D window to get and up/down arrow. Right click/split window and size to 50:50.
- On the R hand new window select the litle cube (3D viewport) icon and switch to UV Map viewport
- LowMenubar:New
- Set name - eg 'yourname UV Map'
- Click UV Test Grid (optional)
- OK (=Save)
[if you want to resize the image use a power of 2 (512/1024/etc) for x and y dimensions as it significantly speeds processing]
- LowMenubar:Image → Pack as PNG → Accept warning (this ensures you will save a copy of the image within the .blend file (I think in 2.4 this may have to be updated manually, but the tickbox in 2.7 implies is should be saved with the rest of the file)
- Check UV map fits on image - adjust with: G - move, R - rotate, S - scale (menu:UV → Transform)
The UV vertices won't always align to pixel boundaries, which means if you don't use 'island margin' above, then painting on one face may also unavoidable paint onto another face. There is reference in the manual to a UV snap-to-pixel option (to align UV vertices to pixel edges) but I haven't figured how to access it yet (and it would only perfectly stop bleed for horizontal or vertically aligned vertices).
- In 3D View window
- Switch to Texture Paint (from Edit Mode)
- in the Toolbar set:-
- Brush
Select white (should be selected by default)
Strength 1.0 (ie 100% replacement of the underlying colour)
Radi 500 (or whatever brush radius you want) - Curve
select the square profile if you want a solid colour brush
select the 'normal distribution curve' if you want a fading brush
(or any other profile you like)
- Brush
- UV Map window
- Switch to Paint (from View)
- Paint the entire object white (or some other basecoat). This is easiest to do in UV Map window
- In 3D View window
- To paint only particular faces, click the face Menu/faceselect (the cube with grid pattern on the face), you will then be able to select an entire face/s with R click (or shift R-click for multiple faces).
- Change colour, strength, radius, curve… and paint the different parts as you wish – painting in either 3D or UV Mesh windows.
NB the colour picker has an eyedropper to copy the colour from within the 3D or UV Map windows – just click on the currently displayed colour (under the colour wheel) to bring it up.
Skinning
- Create an armature at the scene's origin.
- Enter Edit Mode and extrude, duplicate and transform the bones to set the skeleton up.
- Select the mesh, then the armature, and parent. Use empty groups, or automatic weights.
- If you used empty groups or need to correct the auto weights, select the mesh and switch to Weight Paint mode and bind vertices to bones by selecting a vertex group and painting the vertices in the 3D view.
- If you need to bind a portion of the mesh rigidly, enter Edit Mode with the mesh selected, and select the vertices that you want to bind. Select the appropriate vertex group in the Properties window. Then, click Remove and then Assign with the weight slider set to 1. Now the vertices will be bound rigidly to that bone only.
- Use Linked Select to quickly select a contiguous region of a mesh.
Animation
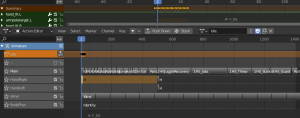
When animating, use the Dope Sheet in the Action Editor mode instead of the timeline. Also have a Nonlinear Animation (NLA) window open for arranging and mixing the actions later.
Making an Action
- Select your armature and enter the Pose Mode.
- Create a new action by hitting the New button in the action editor.
- Rename your action to something like "Idle" or "Running".
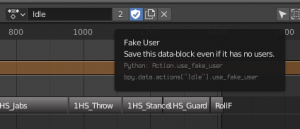
- Click the Fake User icon to make sure this action is not lost when you save and reload the file.
- Scrub to the appropriate time code (frame number) in the dopesheet.
- Select and position a bone or several of them.
- Set a keyframe. The key should appear in the dopesheet window, and a channel will be made for the bone if it doesn't already exist.
- Animate the rest of the bones in this way until the action looks good.
Be sure to set one keyframe for all bones at the beginning and end frames of the action, otherwise motion may "bleed" between various actions.
Looping an Action
A naively created looping animation will visibly slow down and restart with every cycle, even if you use an identical pose for the beginning and end keys.
To make an action loop correctly, you need to add a looping F-curve modifier to all your animation curves (dopesheet channels).
- Select all the channels in the dopesheet. Make sure you're selecting channels, not keyframes - hover your cursor over the channel names and hit 'A' once or twice until they all light up.
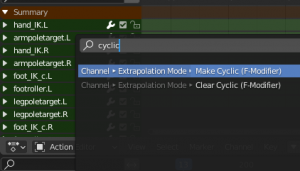
- Apply the Make Cyclic operator. (Use the search bar!) Your animation should now loop correctly.
Arranging Actions in NLA tracks
In order to place an action in a track, you first need to push it down while it is selected.
It is possible to have many tracks and mix different animations by playing them simultaneously, which can save you a lot of work. For example, you can animate hand poses separately from the usual animations and only switch between them in another track. If you want to do this, you will probably want to utilize Keying Sets and Armature Layers to keep bone groups separate.
Setting the animation range
Before you export, you need to make sure that the scene's animation range encompasses all the actions that you wish to export.
You might want to set up some hotkeys so that you can easily do this without having to use the Timeline or Properties windows.
Exporting
- Save your scene
- Export as a .b3d or .x file if skinned, or .obj if static
- Save with the name: models/animal_yourname.b3d
- Save the texture
- UV Window → Image → Save As Image
- Save with the name: textures/animal_yourname_yourname_mesh.png
Exporting OBJ
OBJ file support is built into most known versions of Blender, so just use the provided built-in plugin.
Make *sure* that you check to export the material groups when saving as OBJ, otherwise any models with multiple materials will not texture properly inside Luanti. See: forum thread.
There is no need to write the MTL file as Luanti will not parse it.
Exporting B3D
The recommended exporter for B3D models is available at io_scene_b3d by GreenXenith[1]. It works on Blender 2.93 and should also work on 3.x versions of Blender too.
Installing the exporter
- Download the Blender export script B3DExport.py
- Open Blender
- In Blender open the menu File/User Preferences/Addons. *From here you can press 'Install Add-on from File', navigate to the
.pyfile, and press 'Install'. Now go to File/User Preferences/Addons/Import Export/B3D (Blitz 3D) Model Exporter. - Tick the box on the left to enable it
- Save User Settings
- Close Preferences Window
Importing
There is no good importer for B3D models that can preserve all the model data. Therefore when making B3D models make sure to also save source .blend files that you keep safe in the repository alongside the model.
Exporting X
Blender 2.79 and earlier
Versions of Blender before 2.8 already come with an .x exporter capable of producing text .x files.
Blender 2.80 to 3.0
A version of the exporter updated for 2.8 API changes is hosted here: io_scene_x
As of 7/2020 this exporter is known to work with Blender 3.0 Alpha
The README.md file in that repository contains instructions on how to deal with coordinate space and attachment problems.
Create or copy the inventory texture
- Find or create a nice graphic to be the image in the inventory.
- A flat texture can be created with a 6 sided cube model (eg animal_yourname_yourname.png)
- The inventory image is animal_yourname_yourname_item.png
(Remember to respect copyright – use screenshots of your model, perhaps with the help of a “green screen” for transparency, if you want a simple free graphic. To turn off the 3D viewport grid floor open the properties menu (+ at top R of window), and untick display/grid floor).
Rendering the model
If you want to be able to render the model (F12'), you'll first need to do the following steps to enable the texture:
- In 3D edit view. Add → Lamp → Hemi. You might need to move this around to adjust lighting direction, but probably not.
- In properties viewpane:-
- Select checkered box tab,
- Change texture type to Image → Movie,
- Click on image dropdown below this and select your UV texture image,
- Under mapping dropdown change coord to UV.
Now, rendering should work…
Notes and references
- ↑ As mentioned in the forum thread: Which tools to export animated models?
